Camera Add-on
Introduction to Camera Add-on
The Camera Add-on allows the user to integrate a range of cameras into the software. The plug-in supports, e.g., Firewire 1394 cameras (DCAM standard), USB cameras, as well as all standard Windows DirectShow cameras.

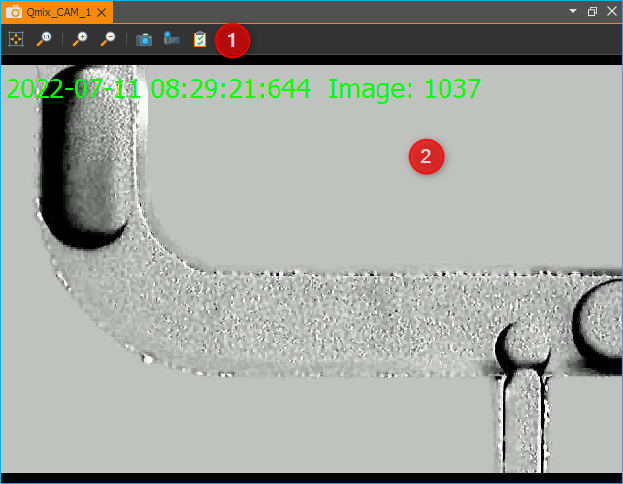
For each camera device the software provides a separate live View ❶ that shows the current live camera image. The Image Analysis View ❷ shows images captured from the camera devices for analysis or storage into files.
Camera Live Image
Live Image Overview
The live image of each camera device is displayed in a View that the user may move freely on the screen desktop via drag-and-drop of the window’s title frame. Thus the user can place the live image on a second monitor and may observe the live image whilst maintaining complete oversight and control over the software settings on the first monitor.
Toolbar
Camera live image
You can show the live image view for a certain camera device via the main menu item .
Toolbar
A Camera Live View provides the following functions via its toolbar or context menu:
|
Resize image to fit window to fit the image into the available display space. |
|
Resize image to its native pixel resolution relative to the screen. |
|
Increase digital zoom |
|
Decrease digital zoom |
|
Capture the currently displayed image into the Image Analysis view. |
|
Record video |
|
Opens dialog for configuration of camera settings |


Adjust Zoom Level
The digital zoom may be adjusted using one of three alternatives:
Toolbar – using the toolbar buttons will change the zoom between preset levels.
Context menu – a right-click into the live image opens a context menu that contains the relevant items to adjust the zoom level.
Mouse wheel – changes the zoom level smoothly
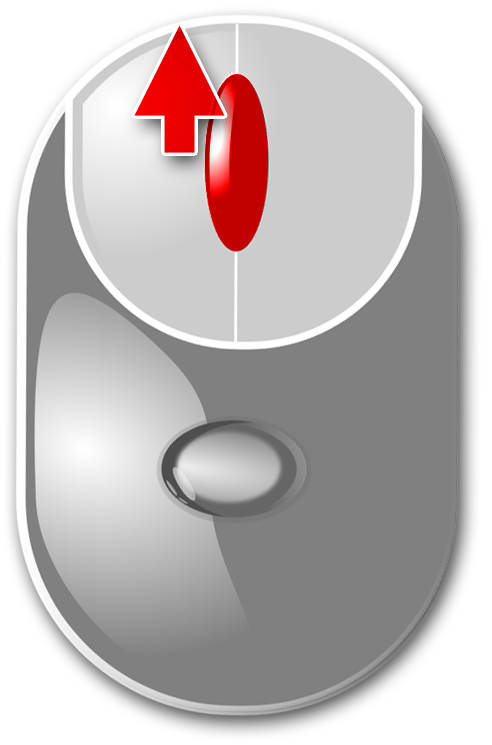

Increase zoom (zoom in)
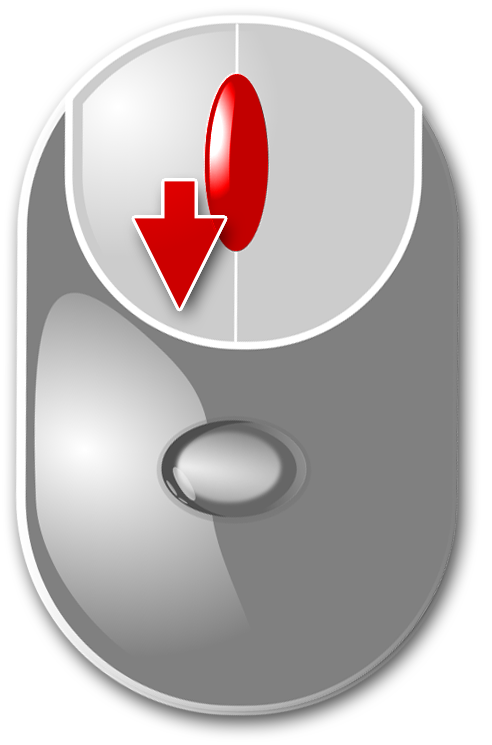

Decrease zoom (zoom out)
Manual Image Capture

Click on the toolbar button Capture Image to capture the currently displayed camera live image. The captured image will be saved to the software’s Image Viewer for further adjustments.
Manual Video Recording

If you want to record the current camera live image as a video, simply press the Record Video button. The video recording will remain active until you stop it by clicking the Record Video button again.
|
Video recording inactive |
|
Video recording active |

In the Event Log of the application you will get status information about the recording state and about the file name of the saved video file.

The file name of each
video file is extended with a time stamp that indicates the start of the
recording. E.g. the recording of the video file
Camera_Recording_20220711_104731.avi started 2022-07-11 at 10:47
o’clock.
Important
The XVID codec is used for video recording. If you want to play back the recorded videos with your media player, it needs to support this codec or the XVID codec should be installed on you computer system.
Camera Settings
Introduction
The quality of the images depends on the lighting conditions and the chosen camera settings. The following will provide an overview of the most important parameters that may be changed via the software.

The window pane to adjust the camera settings may be opened via the Camera Settings toolbar button. It has to main areas:
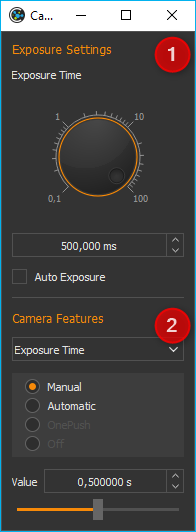
Exposure Settings - to set the exposure settings
Camera Features - to adjust general camera settings
Important
Depending on the used camera type (Direct Show, USB, or Firewire) or model, the actual camera settings dialog may look differently.
Important
Some cameras may not be supported by the Camera Settings dialog and will show their own configuration panel instead.
Setting Exposure Parameters
With Exposure Settings you may set the exposure time of the image sensor inside of the camera. It may operate either in manual mode or in automatic mode. The Auto Exposure mode will adjust the exposure time automatically according to the brightness of the image.
Setting Camera Parameters
All settings of the camera may be adjusted via the Camera Features controls. The feature selection and their respective value ranges may vary according to the type of camera used.
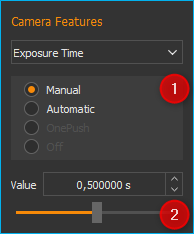
If supported by your camera, you may toggle between manual and automatic modes ❶. In manual mode the values may be changed either numerically via the input box or adjusted via the sliding controller ❷.
Important
Depending on the type of camera used, the available parameters and their value ranges may differ.
Camera Script Functions
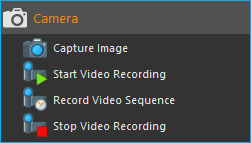
The camera plug-in contains script functions for capturing still images and for recording videos:
Capture Image
This function allows you to capture and save a single image from the selected camera device ❶. The Image File section ❷ is to set the file path and file name of the captures image files. Subsequently you may set whether the camera settings should be used unaltered ❷ Keep Camera Settings or whether to reset them to pre-defined and saved values ❸ Change Camera Settings before capturing an image.
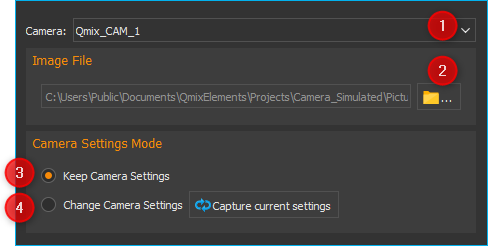
The current camera settings may be saved as function parameters by pressing the button Capture current settings to be able to reset the camera to those parameters just prior to capturing another image at a later point. Thus you can take images of different objects with completely different camera settings.
Tip
You may select from different image formats
by setting the appropriate file extension (.png or .jpg).
Every image file name will be appended with a time stamp at the time of
capture. This is, when you have defined the file name as Photo.jpg the
resulting file will be saved as Photo_20120921_154502.jpg according to
the syntax name_YYYYMMDD_hhmmss.jpg.
Tip
You may capture images at set intervals to subsequently compile them to a stop-motion movie using the Video Builder plug-in.
Start Video Recording

With this function you can start recording of the camera live image into a video file. The record will remain active until it is stopped with the Stop Video Recording function. The video recording will stop automatically when the script execution ends.
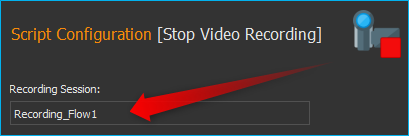
In the configuration area you can configure all the video recording parameters. Enter a unique name for this recording session in the input field Recording Session Name ❶. This name is required to stop the recording later with the Stop Video Recording function.
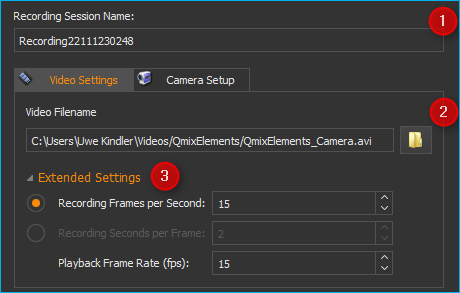
Configuring video settings
In the Video Settings tab, you configure all video settings. Click on the button with the folder icon ❷ to select a file name and a storage location for the video file in the Video Filename field.
Important
Every video file name will be appended
with a time stamp that identifies the start of its
recording. This is, when you have defined the file name
as Video.avi the resulting file will be saved as
Video_20130522_154502.avi.
By clicking Extended Settings ❸ you can display additional settings. In the field Recording Frames per Second set the number of images to be recorded per second. To get a real-time video playback later, you should use the current camera frame rate.
Tip
If you create a new recording function, the current camera frame rate is automatically entered into the Recording Frames per Second field.
If you want to monitor slower processes, you can also choose a smaller frame rate for recording. If you check the check box Recording Seconds per frame, you can choose very slow frame rates (several seconds or minutes per image).
This mode is suited for creating time-lapse recordings of very slow processes. So you can for example, take a picture every 30 minutes for several days and then play back these captured images in a video with a frame rate of 24 frames per second.
In the input field Playback Frame Rate (fps), set the frame rate at which the film is played back in media player later. In the fields of video production or motion picture a frame rate of 24 images per second is the standard frame rate. If you want to play back the movie in real time, that means with its real recording speed, you should choose a frame rate here, that matches the recording frame rate.
Configuring camera settings
Select the Camera Setup ❶ tab to display the controls for configuring the camera settings:
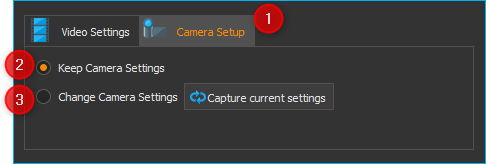
Here you may set whether the camera settings should be used unaltered ❷ Keep Camera Settings or whether to reset them to pre-defined and saved values ❸ Change Camera Settings before capturing an image.
The current camera settings may be saved as function parameters by pressing the button Capture current settings to be able to reset the camera to those parameters just prior to capturing another image at a later point. Thus you can take images of different objects with completely different camera settings.
Record Video Sequence

Use this function to record a video sequence with a fixed duration. You can configure the desired recording duration and the recording stops automatically after the expiry of the recording time.
All video settings and camera settings for this script function are identical to the settings of the Start Video Recording function. Additionally you may set the recording duration for this function.
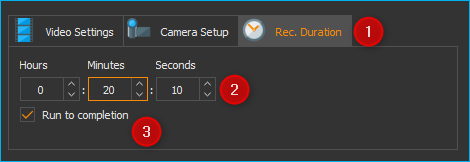
Select the tab Rec. Duration ❶. Now you can set the recording duration accurate to the second ❷. Use the selection field Run to completion ❸ to determine, when the recording function is finished and when the next script function will be executed:
Check box active – the next function is executed when the recording is completed
Check box inactive the recording is started and then script execution immediately continues with the next script function
Tip
The recording of a video sequence can be stopped at any time by calling the Stop Video Recording function.
Stop Video Recording

A running video recording that was started with the functions Start Video Recording or Record Video Sequence can be terminated at any time with this function. Simply enter the name of the recording session you want to quit into the input field Recording Session.