16. Image Analysis Plugin
16.1. Introduction
This plug-in allows you to view, edit, and save images using the most common image file formats (PNG, JPG). In addition you can use it to:
zoom in and out of images,
easily navigate within an image,
measure the dimensions of details of an image.
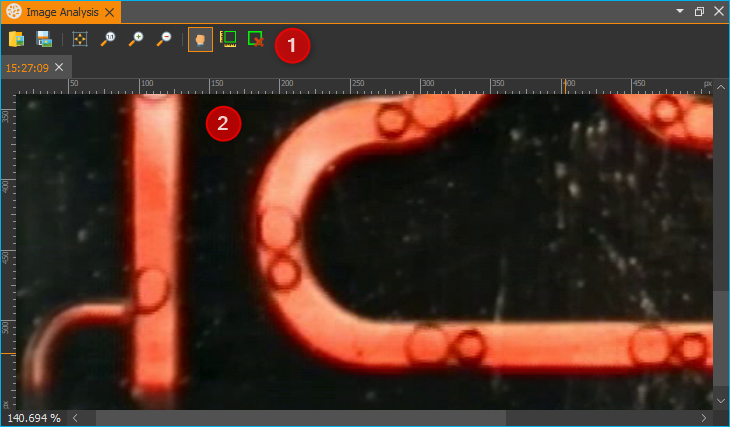
You can show the Image Analysis View via the main menu iteme . The user interface of the Image Analysis View consists of two main elements: the Toolbar ❶ and the Image Viewer ❷.
16.2. Toolbar
Open image file. |
|
Save current image. |
|
Adjust display size of image to completely fill image viewer area. |
|
Resize image to match original pixel size. |
|
Zoom in to image. |
|
Zoom out of image. |
|
Pan tool to move the currently displayed image section. |
|
Draw rectangular measuring box. |
|
Remove all measurement overlays. |
Tip
You can also open image files easily via drag & drop. Simply drag an image file from your file system over the image analysis workbench and drop it there.
16.3. Image Viewer
16.3.1. Overview
The image viewer contains the following elements:
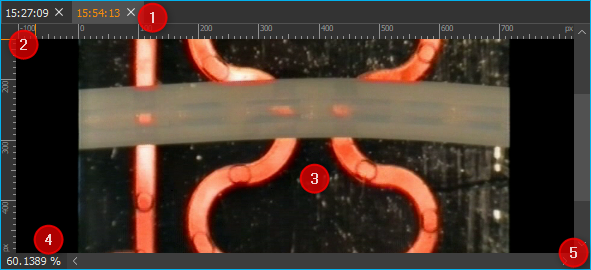
Tabbed list of available images.
Ruler with customizable dimensions.
Display area.
Zoom level status bar.
Scroll bars.
A new tab displaying the file name will be added for each opened image, e.g., when you open an image file or take a screen shot using the camera. The active tab is highlighted. To close a tab, left-click on the cross icon that is displayed on the right hand side of every tab (see figure below).

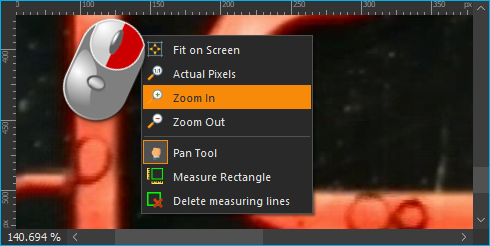
To easily access the most frequently used functions, use the mouse and right-click within the image viewing area. This will open a context menu with most of the same buttons that are shown in the toolbar.
16.3.2. Select Scale Unit
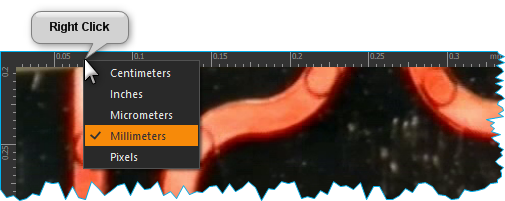
You can select between different scale units for the ruler to measure objects displayed in the image viewer window. To change the scale unit right-click anywhere within the ruler. This will open a context menu with the list of available scale units (see figure below).
16.3.3. Select Zoom Level
Use the Zoom In or Zoom Out buttons in the toolbar to adjust the zoom level. Alternatively, simply place the cursor into the image viewer area and use the mouse wheel to re-scale the panoramic image.
Increase zoom level. |
||
Decrease zoom level. |
16.5. Measurement of Objects
16.5.1. Draw a Measuring Box
Tip
Before drawing a measuring box, select the desired scale unit.
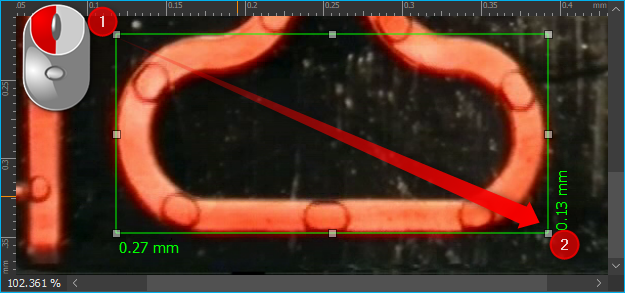
You can draw and adjust a measuring box using the following steps:
16.5.2. Moving the Measuring Box
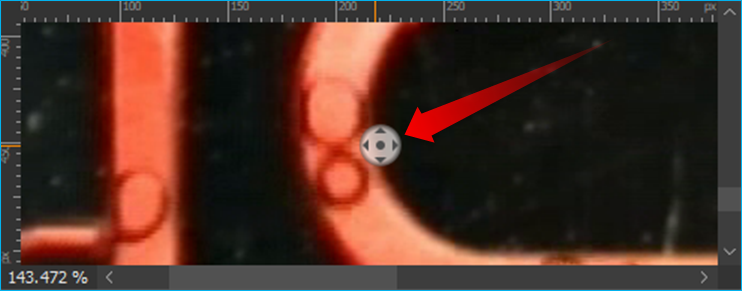
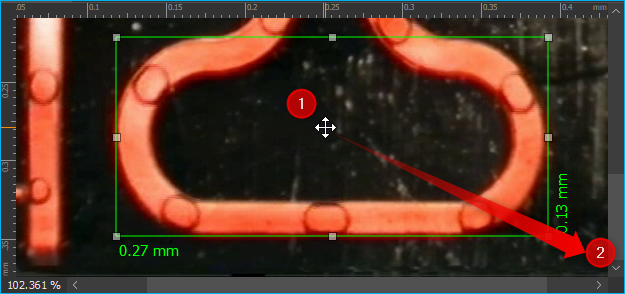
To move an entire box to a new location within the viewing area, first place the cursor within the box so that it changes into a crossed arrow ❶. Left-klick to drag the measuring box to its new position ❷.
16.5.3. Adjusting the Size of a Measuring Box
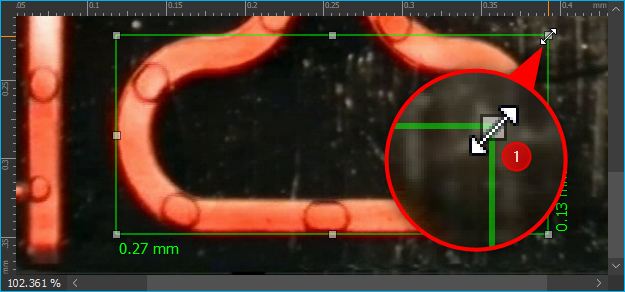
To change the size of a measuring box, move the cursor to one of the 8 square drag handles at the corners or the sides of the box (figure below). The cursor will change to a double-sided arrow ❶, which indicates that you can now resizing the box by dragging the respective mark to a new position.
16.5.4. Deleting a Measuring Box
You can delete individual measuring boxes. First click into the respective box to activate it – the activated box can be identified by the presence of the check marks. Press the Delete button of your keyboard to remove the box.
Delete all measuring boxes within an image by clicking the button Delete measuring lines button in the toolbar or via the context menu.
